Cutting Thin Strips Simply & Safely
Its not uncommon to need thin strips of wood and plastic materials for embellishments to various projects.
This is my version of a thin strip cutting jig that focuses on safety and simplicity.
This jig takes between 30 minutes to 1 hr to complete.
This jig takes between 30 minutes to 1 hr to complete.

This jig will cut 1/16 thick materials without getting caught below the jigs stop block. Shown in the photo is a 1/16 x 1/16 strip cut from fiberboard.
Parts of the Jig
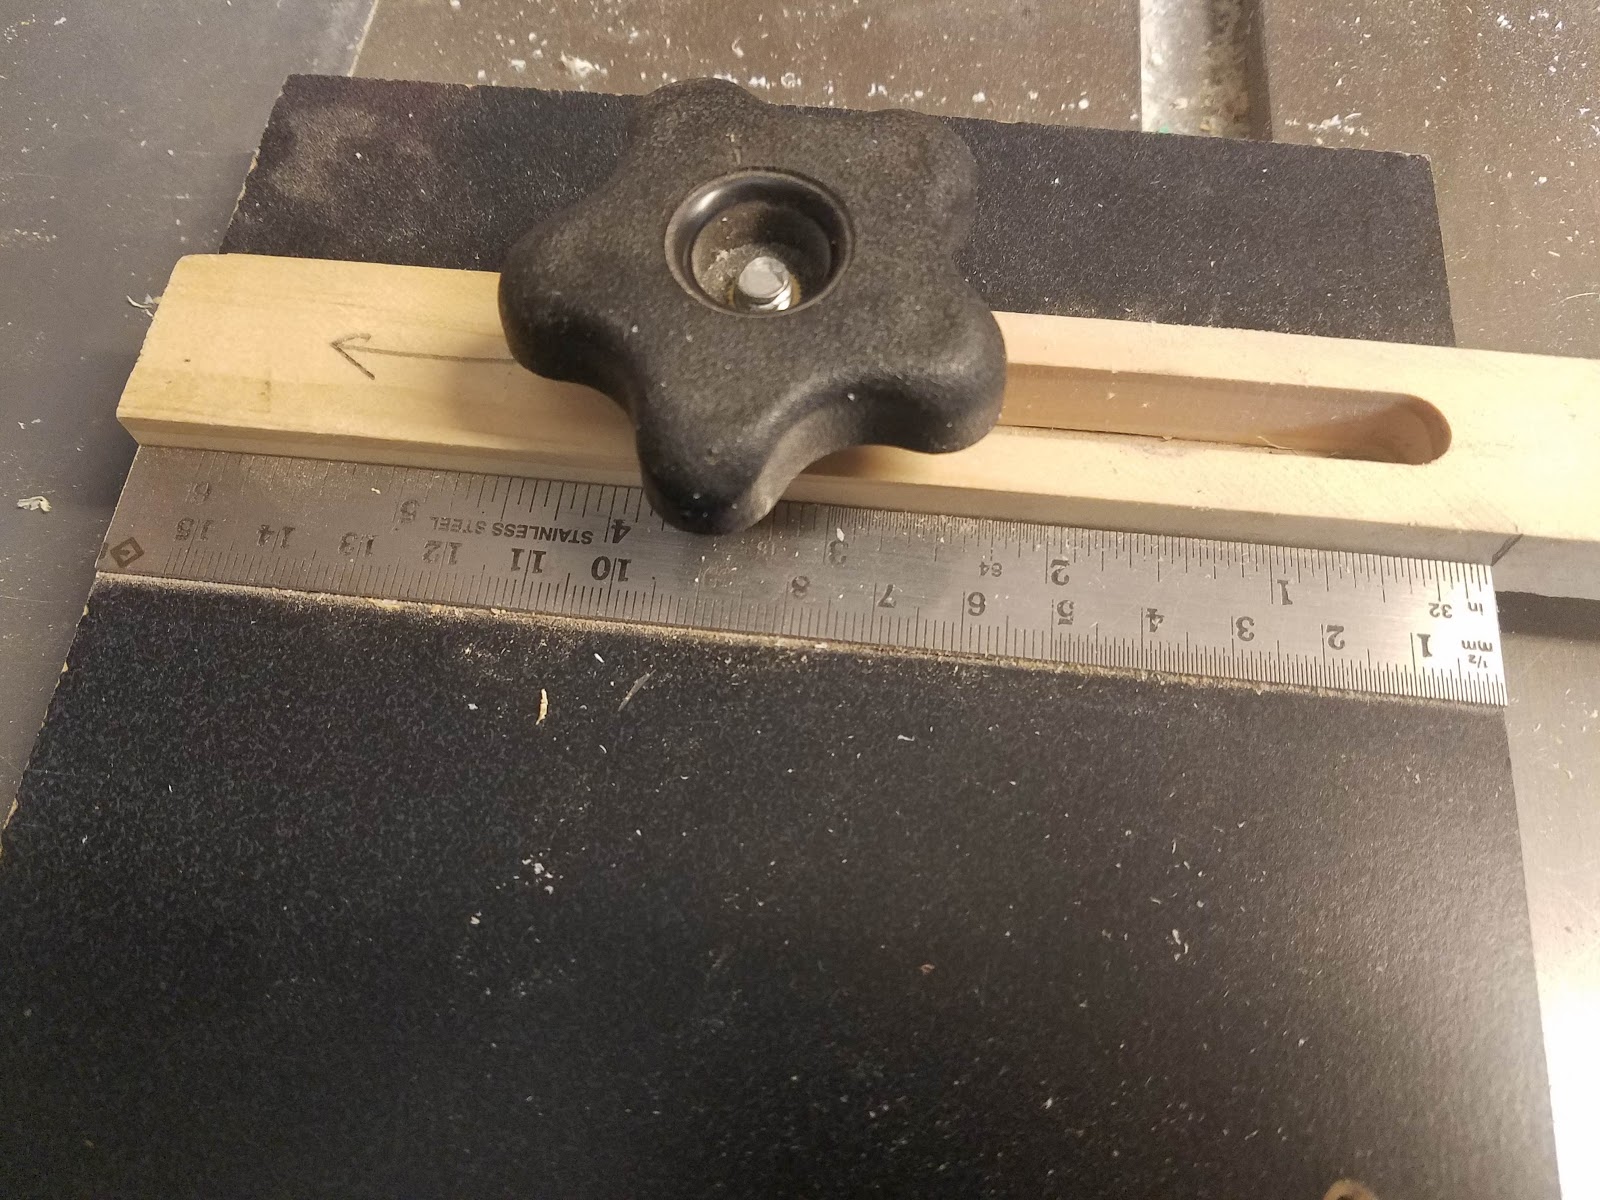
The jig consists of a MDF base, a sliding arm, a retaining knob, a miter slot guide and a bearing assembly.
I have not included a drawing or dimensions as yours may be different based on your type of saw and what scrap you have available.
You need base material to be thick enough to accept a dado and still be stable. I used a 3/4" piece of scrap MDF.
You need base material to be thick enough to accept a dado and still be stable. I used a 3/4" piece of scrap MDF.
Base


The base is a scrap of MDF about 6" wide and 3/4" thick with a dado slot that is cut on its top surface 90 degrees to the table.
The bottom of the base has a miter slot guide screwed/glued to its underside that runs the length of the base and parallel to the blade. Its important that this guide be perpendicular to the blade when the guide is in the miter track of your saw.
Optionally you can glue a ruler to the base near the sliding arm so that the gap from the bearing to the blade can be set or observed. The gap is the thickness of the strip being cut.
There is a 1/4" bolt hole drilled in the center of both the dado slot and the width of the base. The bolt in stalled in this hole accepts a 1/4" knob which serves to lock the sliding arm in place.
Sliding arm

The sliding arm is a piece of scrap whose width is cut to fit the width of the dado and long enough to reach the saw blade when its it deployed.
The sliding arm has a slot routed long enough to reach the blade when installed in the miter slot of the saw.
Bearing Assembly
One end of the sliding arm has a 1/4" hole drilled as close a practical to its end and in the center of the arm.
In that 1/4" hole a bearing is mounted using a, washer and wing nut.
The sliding arm is sanded in an arc as to give the bearing as much exposure as possible.
Any bearing will work as long as it fits between the sliding arm and surface of the saw. You may also need to adjust the placement of the hole in the end of the sliding arm accordingly.
The head of the 1/4-20 bolt was ground to its minimum thickness in order to keep the bearing as close to the tables surface as possible.
There is a plastic washer on either side of the sliding arm to keep the bearing from binding when the wing nut is tightened.
On the bearing, check that the shoulder on the bore for the shaft is proud of the bearings sides so that when a surface is pulled tight against the bearing it will not bind against the bearings race.
This bearing [from my stash] has a retaining boss (see bottom ridge) that nicely reduces the area that the wood being cut sees, reducing error and friction.

Using the Jig
Using the jig is simple. Insure that you use a zero clearance blade. It will keep the thin strip from falling into down the side of the blade and also minimize tear out.
 |
| Slide the jig forward in the miter slot so that it is positioned directly across and perpendicular to the starting teeth of the blade. Release the knob and deploy the sliding arm until the bearing contacts (tangent to) the side of the blades teeth. |
 |
| Move the sliding arm away from the blade equal to the desired width of the cut strip. Tighten the knob on the sliding arm. |
 |
| Adjusting the fence to hold the wood against the bearing. Note the wood is not touching the blade! |
- Pull the base back toward the front of the saw well away from the blade.
- Insert a piece of wood against the bearing and bring the fence over to touch its opposite side.
- Adjust the fence such that the wood is captured between the fence and the bearing.
- Now your fence is set such that a thin strip will be cut from the side of the wood opposite the fence.
- **Start the saw with the wood pulled back from the blade
- Using a push stick, push the wood through the blade-fence slot cutting off a thin slice.
- After turning off the saw and waiting for the blade to stop, make subsequent cuts by pulling the wood backward until its clear of the blade.
- Release the fence and move it and the wood toward the bearing until the side opposite the fence touches the bearing.
- Lock the fence and go to step **....
Safety note: to avoid a kickback do not pull wood backward through the blade while it is running.
Note: I have never seen the need to lock the jig in place as there is little friction between the bearing when rotating and the wood being cut. Even if the jig moves forward and back that does not create an error in the cut.
Example locking technique and gcode: https://www.youtube.com/watch?v=G3-3x9qNXws
Or you can buy these clamping tracks: https://www.rockler.com/miter-slot-hardware-kit
Shop Notes
Woodsmith
Enjoy and comment,
Don
Improvements
Lock the Jig
The jig's position could be locked into the miter track by drilling a hole through the base and miter guide. A flat head tapered shoulder screw is inserted in that hole from the bottom. When a knob on that screw is tightened the head of the tapered screw will cause the wood to swell in the track and lock it.Note: I have never seen the need to lock the jig in place as there is little friction between the bearing when rotating and the wood being cut. Even if the jig moves forward and back that does not create an error in the cut.
Example locking technique and gcode: https://www.youtube.com/watch?v=G3-3x9qNXws
Or you can buy these clamping tracks: https://www.rockler.com/miter-slot-hardware-kit
Other Jigs and Approaches
WoodWorkWeb (I do not like the potential to kickback with this approach).Shop Notes
Woodsmith
Enjoy and comment,
Don
No comments:
Post a Comment