Sunday, December 16, 2018

Rolling Pin

My First Shop Made Rolling Pin

My daughter in law collects rolling pins. I didn't want her collection to be void of a version from my shop.
This pin was turned from maple with walnut handles.  I got the hardware from Woodcraft and the wood from my vast pile. 
It was a fun project and I simply followed the instructions that Woodcraft provided with the hardware kit.
I bought the brad point bit they suggested and it was well worth the $ to get a hole bored straight through the pin.
Take your time finding the center of the blank and this project will go smoothly.

The cutouts for the bearings

Drilling a hole from either side with a brad point bit.
Layout was important

Removing the corners with the band-saw jig

Turning the handles


Why is getting them to look the same so hard!

All assembled. Stainless shaft and sealed bearings


Enjoy and comment,
Don

The Beauty In the Blank

Beauty is More Than Skin Deep

This work is dedicated to "Greg Brenard who passed this week. Greg was a brother-in-law, friend and my wood turning sensei.

-------
I knew something was out of wack in our universe. It was my wife's ceramic yarn bowl among the many wooden hand turned round things in our house. I had not noticed that she has been using a ceramic one ... for years, she said!
So I'm here in the shop just 14 days to Christmas and I decided to make my wife, who knits profusely, a wooden yarn bowl.

I clomped through the snow out to my shed where there is a stash of wood that has been drying for more than 10 years. I found a blank of burl that seemed perfect for the job.

But what to my wondering eyes should appear....
A series of voids and wandering grains that unveiled the hidden beauty of this piece of wood.
That was the end of the yarn bowl project. The idea put aside while I attended to this beauty!
That's it I will call it "The Beauty"....


Prepare the Tenon

It became obvious as I formed a tenon for the chuck that this piece would be a challenge. A large # of voids were present near the bottom of the blank making me wonder how well it would hold up under the remaining roughing passes. These piece would take patience with light cuts wherever possible.

I found that a pretty smooth cut can be achieved by using a sharp bowl gouge in a nearly "closed" position. In an almost vertical position it sheer cuts the wood on the tools cutting edge producing very fine shavings and a smooth surface. 
On this piece I used this tool position to finish the bottom near the tenon as it likely that I will not be able to get close-in once the "beauty" is mounted in the chuck.

Ready for Hollowing?

The Beauty was mounted in the chuck and on the lathe ready for hollowing. 

A Hollowing Experience

The hollowing process consisted of repeating:
  • Drilling with a 2" Forster bit to remove some of the meat
  • Hollowing with a olander bit up to a 1/4' wall
  • Semi-finish with round carbide cutter
  • Finish with my beefy curved scraper
I repeated the above process a few times until I was near the bottom.

Wow not much of the rim left but looks cool!


There are two problems obvious with this piece at this stage:
  1. It  is going to be hard to get the inside smooth with all the voids. Reaching in with sandpaper is to dangerous. I will have to use a scraper for the inside..... difficult with all that cutting in space due to voids.
  2. How am I going to turn the beauty around to remove the tenon and finish the bottom???

Work Holding the Beauty 

I have to somehow flip and mount the Beauty so I can turn the tenon off and finish the bottom. I also need to mount the finished piece so that I can spray lacquer it while its turning.

I decided that the only way I would be successful was to mount the bowl to a fixture by affixing something to the inside bottom and what rim is left.
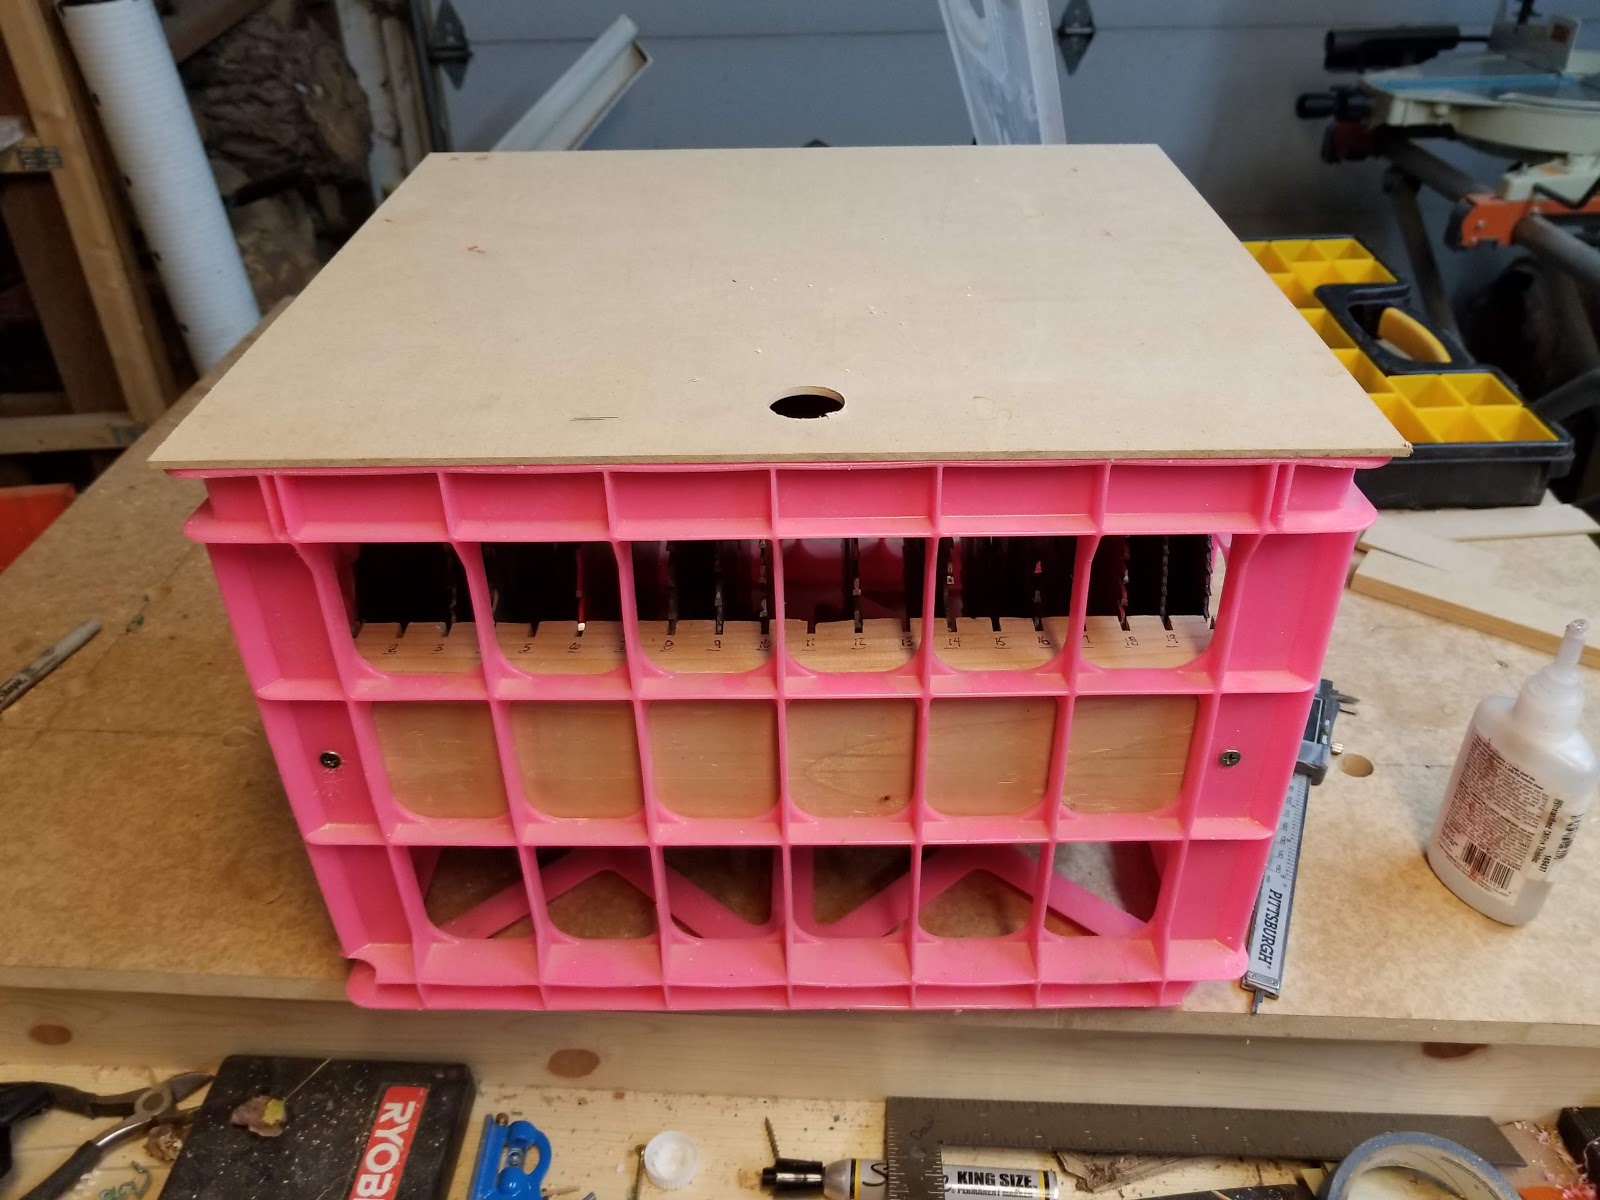
I decided to:
  • Use a piece of PVC pipe mounted in another chuck to reach the bottom.
  • Use a piece of flat stock with a hole the size of the PVC to make a Rim Plate to attach the rim to the PVC.
  • Use hot glue since I need to be able to remove the Beauty when done
  • Use a threaded adapter in the tail stock to align the second chuck while on the lathe and before I remove the first chuck
Drilling hole in Rim Plate using an adjustable hole drill.
This needed to match the PVCs' OD which is not a standard size.

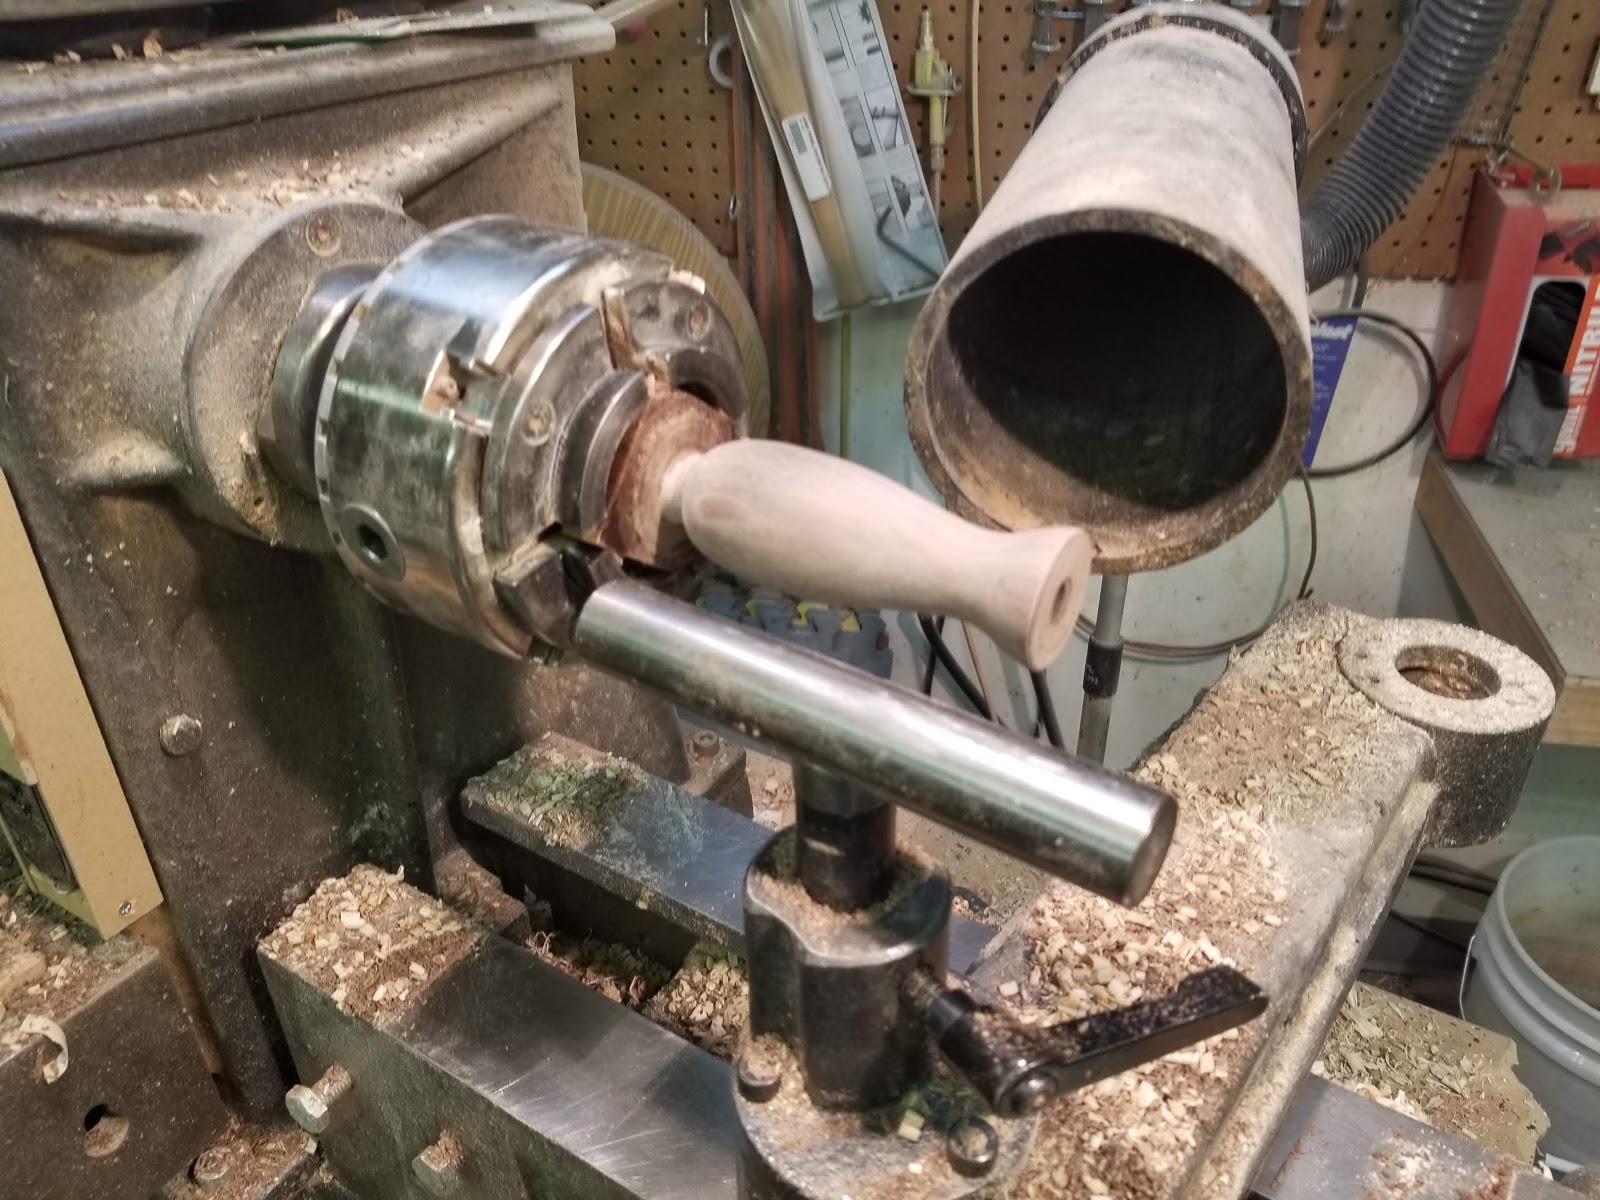
PVC pipe chucked and extends into the Beauty. Glued to the bottom.
The Rim Plate slipped over the PVC and glued to Beauty's rim.

Ready to turn around.
To the right (out of view) is the second chuck in tail stock.
The threaded adapter kept the second chuck on center


Finishing the Bottom

Light cuts with a detail gouge was needed to keep this assembly in tack while cutting the bottom. To make matters worse there were voids in the bottom that caused vibration while cutting. 
The need to run pretty high speed to aid in getting a good finish exacerbated the situation. 
This is a good time to stand to the side of the piece while turning in case it came off. 
The tail stock was left engaged until the very last finishing cut.


Freeing the Beauty

I used a heat gun to carefully soften the hot glue and part the Rim Plate from the rim. When the glue is hot you can wipe it away with a soft cloth. I wondered if the glue stays in the grain and would give me problems with the finish.
Note the glue mark around the rim :(


Finish the Beauty's Exterior

I left the pipe in the Beauty so I could rotate the piece during finishing. I decided to use Deft Satin lacquer as I did not want a high gloss sheen to detract from the grains beauty.
I used 10 coats and sanded (after waiting 24 hrs) below any shiny spots at every 5 coats.
Finishing on my slow rotation jig
Dry and ready to finish the inside

Removing the Pipe

The pipe was removed by directing a heat gun down the inside and around the pipe.
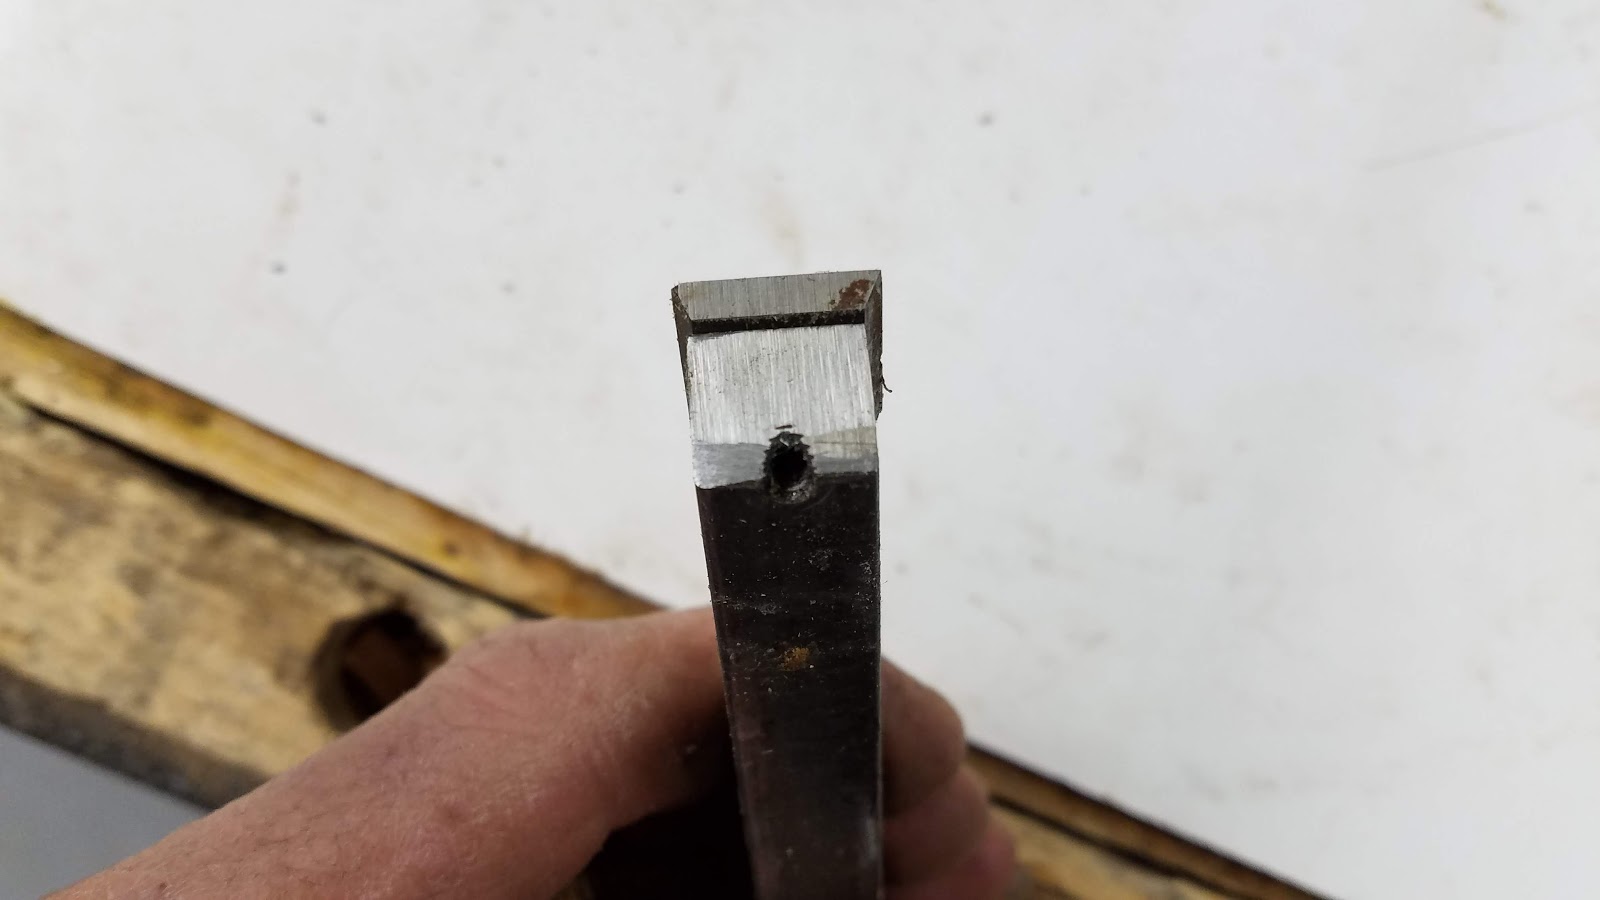
I sharpened the curved edge of this linoleum knife.
Then used it like a scraper in the bottom,
 removing the glue residue.

Pretty clean!

Finish the Inside

The Beauty was remounted to a wood face plate using hot glue so the inside could be finished while slowly rotating. 

Completing the Beauty

The finish was allowed to dry for 24 hours and then was removed from the wood face-plate, buffed and waxed.


The Yarn Bowl

The yarn bowl project followed this interruption!

Enjoy and comment;
Don


Yarn Bowl


Replacing That Ugly Porcelain Yarn Bowl

If you read the "Beauty" post you know that I started to turn a yarn bowl to replace my wife's porcelain one. I was interrupted by a beautiful piece of burl that morphed into the "Beauty".

"Spinning a Yarn".... Bowl

This bowl was turned from a dry piece of ash with wood burned edge treatment and a hand carved hook. 
This is the first time I have turned ash and I found it to be very difficult to rough out but a dream to shape and cut.
This bowl needed very little sanding after shaping with sharp gouges and sheer cutting with my scrapers.
This was a typical bowl turning process with subsequent hand work. Here are some highlights....

A Slap on the Wrist!

Safety is so important when turning. I have been doing this a long time and from time to time you get surprised. When I was struggling roughing this bowl somehow it came off between centers. Yup it ricochet'd off my wrist and flew by me. Had I not been standing to the side I would have been hit in the head!
OUCH!

Cutting the hook with a fret saw


Reversed on my vacuum chuck for bottom finishing

Finished with danish oil 
Dusty the "shop dog"!


Enjoy and comment
Don

Shop Made Carbide Tool

Can a Carbide Tool be Made in the Shop?

The short answer is yes! 

Materials:
  1. A piece of 1/2" square stock (I got mine from McMaster). I do not recommend using carbon steel. Something like this should be adequate. 
  2. A cutter blade and tapered screw. Many are available choose one that fits the size stock you are using. They run from $9 to $20. 
  3. Handle shop made or universal handle.
  4. Total cost less the handle could be <$20.
Tools:
  • Grinder
  • Hand file
  • Drill and Tap for the carbide cutters screw
The biggest challenge with making this tool is getting the position of the tapped hole in the right place. It needs to be placed exactly between the end of the stock and the rear of the perch. 
The second challenge is to get the grind on the back of the porch for the cutter in the right place at the right angle so the stock does not dull the cutter but also holds is straight.
After doing this the hard way I would recommend this approach:
  1. Lay the cutter on the stock leaving about an 1/8 inch of material protruding beyond the front of the cutter.
  2. Mark the front and back of the cutter laying on the stock 
  3. On the side of the stock mark the depth that the cutter needs to be recessed 
  4. Grind the perch down to the recessed depth on a grinder. Do not grind beyond the mark where the rear of the cutter will sit. I ground a bit in front of it.
  5. Using a file dress up the perch so that it is flat and parallel to the stocks bottom surface.
  6. File an angle on the back of the perch that matches the cutters angle. I used 45 degrees.
  7. Lay the cutter back on the stock fully engaged with the rear of the perch and mark the hole
  8. Accurately drill and tap a hole for the the retaining screw. You may need to drill a small recess in the top of the hole because the bottom of the tapir in the retaining screw may not have threads. This relief will allow the screw to fully seat in the cutters tapir and grip tightly.
  9. Mark and grind the front nose of the stock to match the angle on the front of the mounted cutter.
  10. Insert into a handle or make a dedicated handle for the tool.
Square cutter sitting on perch

The front angle was ground first and ended up a bit short :)
See the process above to prevent this. This error may make this tool grabby!


Inserted into handle

Note: you should be able to mount a round carbide on this tool but of course a diamond shape will not fit. I would expect that the rear of the perch can be relived with a dremel tool to accept a diamond cutter.

Enjoy and comment,
Don


Storing Tool Rests on the Stubby

Organizing Tool-rests

I found myself walking across the shop all the time to change tool rests. I decided to locate them on the lathe.
You can also see the tail stock hinge I have been using for years to avoid lifting that thing to the floor and back.


Enjoy and comment,
Don

Greg Bernard

Greg passed this week.
 I would say; "Rest in Peace Greg!".
However I know Greg will not be "Resting". 

Many knew and were in awe of his carpentry skills, I knew him as my wood turning sensei. He was quietly one of the most skilled turners I have ever met. When I first started thinking about serious wood turning Greg got me started on the right foot. Wow a brother in law interested in the same hobby as me, how lucky I am. That was more than 15 years ago and I have been turning wood ever since.
I enjoyed visiting him at his shop and the few times he came to mine. We would go to the wood pile, he had many  of them hidden all around his properties, and pick out a hunk of wood. Mounting it on the lathe he would turn to me and say; "Don does it speak to you". I would retort; "Greg have you been drinking your homemade wine again?". He would chuckle and say; "When you become a real wood turner the wood will speak to you".
This is no joke, on the day of his passing I was in the shop turning on a pretty unimpressive hunk of wood, planning to turn a common bowl. As I was turning I realized that under the bark was an gorgeous burl. I stepped back and looked at the emerging wood which seemed to say" I am not a bowl". I looked closely at the wood and said to myself, this should be a hollow form [a lot more work]. As I started to cut with a new design in mind, I thought Oh my god! Greg was right, wood does speak! At that moment I paused and wondered how Greg was doing as I had not talked to him in quite a while. On the next day I learned of his passing.

This is the "Beauty" I referred to above: The-beauty-in-the-blank

One such turning event in my shop was captured! In this video you see Greg turning a mulberry blank. We were just turning wet wood for fun and if I recall the piece later cracked.


http://www.turnedoutright.com/2007/09/22/greg-visits-the-shop/

I will miss you dearly Greg, thank you for the lifelong skill you gave me and I will think of you every time I stand in front of the lathe and listen to you to speaking to me!

Don

The Stubby Gets a Control Panel Post

Adding a fixed place for the Stubby's Pendant

I am always looking for ways to make my turning process more efficient. This week I realized that I spend a lot of time moving the pendant around the bed. I like this flexibility but at the same time really just need it within reach. I came up with this solution.
The post is attached to the short bed with a cartridge bolt whose head is ground down to fit the large hole in the key way. This way I can change the position of the post or remove it easily by loosening the wingnut and sliding the post downward and out.

Positioned if your turning on the left side and its in the way

Typical position of the post

Attachment detail

Carriage bolt ground to fit into the key way

This is what was added...
Enjoy and comment please;
Don

Sunday, December 9, 2018

Saw Blades Storage Box

A Simple Way to Store Lots of Saw Blades

I decided that my table saw blades needed a home other than being stacked in a corner potentially chipping the teeth. I canvased the web looking for ideas for a storage container. I found lots of great ideas but they all required building containers for each blade. A nice idea but I didn't feel like investing that amount of time and wood.
So while looking around my shop for inspiration an empty crate "spoke to me" and the project started.

This blade holder is compact, inexpensive and protects all the teeth of all the blades. The blades do not touch each other and the blades never touch anything but wood and plastic.
It is easy to store and carry using the crate handles.
This crate stores 20 blades

Design

The idea was to stack the blades on edge pinned between 2x 2x4's that were screwed to the side of the crate in the center of its depth. That seemed simple enough.
Any crate will work, mine was a 12" wide file crate. Pink is not my first choice but it was sitting on the floor staring at me. 

Fabrication

Fabrication was simple, just cut 1/8 slots crosswise in each 2x4. Its nice that the blade on any saw is the exact kerf of the blade that will go in that slot...Hello! Although I have some thin kerf blades the widest kerf blade was used to make the cuts.
I knew however that if the slots in each of the side inserts did not align across from each other perfectly the blades would probably bind going in. With a 1/8" slot there is not a lot of room for cumulative errors.

Prepare the Slotted Inserts

Step 1: cut the 2 x 4's to length so they fit perpendicular to the long inside dimension of the crate. A snug fit is important so that the slots in either side will line up.

Step 2: plane and joint the 2 x 4's flat and square. [you could skip this step if you had reasonably straight and flat dimensional lumber]

Step 3: with CA and accelerator glue the 2 x 4 edge to edge so that they act like one board. This will insure that the slots on each insert will be cut in exactly the same place. Just use a few dots of super glue. We don't want a permanent bond just enough to keep them registered.

Step 4: calculate the depth of the slot based on your final dimensions of the Slotted Inserts. 

Slot Depth = (ID-(2*SI))/2

Where:
     ID= Inner dimension of the crate. The dimension parallel to the direction the blades will be inserted.
     SI= final thickness of Slotted Inserts

Cut the Slots

Step 1: Set the Slot Depth. I used the depth stop on my miter saw.
Step 2 : I used two aids to mark and cut the slots. 
  1. A 1/8 thick piece of MDF to wedge in the slot after cutting. 
  2. A  1/2 thick piece of MDF to use as a spacing gauge. [Made from 2x pieces of 1/4 thick MDF CA'd together] 
Depth stop swung into place on miter saw

1/8" MDF wedge keeps boards aligned and provides a reference for the next slot.
These Slotted Insert boards are temporarily glued together.

1/2' spacing gauge up against the wedge to mark next line

Aligning the slot and cutting it on miter saw
Step 3: Follow this process for cutting the slots:
  • Mark and cut the first slot 1/2" from one edge of the Slotted Insert glue-up then
    1. Insert the wedge in the last cut slot
    2. Hold the spacer gauge against the wedge and mark the next slot cut line
    3. With the wedge still installed in the last cut use the laser guide to set up and cut the next slot
    4. Go to sub-step 1 and repeat until all slots are cut. I cut 20 slots.
  • Mark the same ends of the Slotted Insert sections so that when you part them you will know which end points the same direction
  • Break the two Slotted Inserts apart. I just rapped the joint on the edge of the bench and the super glue gave way.
  • Number the slots on the top edge, this aids in lining up either side of the blade when inserting into the crate.
Breaking the two Inserts apart

Mounting the Slotted Inserts and Loading Blades

Screw the inserts 1/2 say down inside both sides. Drill pilot holes and screw from the outside.
Load in your blades. Some organization is useful. I loaded mine from the right to left. Highest # of teeth on the right moving to the lowest on the left. Hmm that feels backward!

Add a Top for Safety

I advise making a top to protect the tops of the blades and any of your body parts that may come in contact with the sharp teeth.

Top shown upside down.
Note the Slotted Inserts mounting screws 1/2 way down the face of the crate

Completed Blade Storage Box
Like any sharp tool in your shop the cutting edges can ..... well cut. You need to use care when handling saw blades and grab the blade from the crate with a pair of gloves. You will notice some bloody decorations on the top of my box. Yep cut myself!
Nicely tucked away in a corner
Enjoy and comment;
Don