A Simple Way to Store Lots of Saw Blades
I decided that my table saw blades needed a home other than being stacked in a corner potentially chipping the teeth. I canvased the web looking for ideas for a storage container. I found lots of great ideas but they all required building containers for each blade. A nice idea but I didn't feel like investing that amount of time and wood.
So while looking around my shop for inspiration an empty crate "spoke to me" and the project started.
This blade holder is compact, inexpensive and protects all the teeth of all the blades. The blades do not touch each other and the blades never touch anything but wood and plastic.
It is easy to store and carry using the crate handles.
 |
| This crate stores 20 blades |
Design
The idea was to stack the blades on edge pinned between 2x 2x4's that were screwed to the side of the crate in the center of its depth. That seemed simple enough.
Any crate will work, mine was a 12" wide file crate. Pink is not my first choice but it was sitting on the floor staring at me.
Fabrication
Fabrication was simple, just cut 1/8 slots crosswise in each 2x4. Its nice that the blade on any saw is the exact kerf of the blade that will go in that slot...Hello! Although I have some thin kerf blades the widest kerf blade was used to make the cuts.
I knew however that if the slots in each of the side inserts did not align across from each other perfectly the blades would probably bind going in. With a 1/8" slot there is not a lot of room for cumulative errors.

Prepare the Slotted Inserts
Step 1: cut the 2 x 4's to length so they fit perpendicular to the long inside dimension of the crate. A snug fit is important so that the slots in either side will line up.
Step 2: plane and joint the 2 x 4's flat and square. [you could skip this step if you had reasonably straight and flat dimensional lumber]
Step 4: calculate the depth of the slot based on your final dimensions of the Slotted Inserts.
Slot Depth = (ID-(2*SI))/2
Where:
ID= Inner dimension of the crate. The dimension parallel to the direction the blades will be inserted.
SI= final thickness of Slotted Inserts
Cut the Slots
Step 1: Set the Slot Depth. I used the depth stop on my miter saw.
Step 2 : I used two aids to mark and cut the slots.
- A 1/8 thick piece of MDF to wedge in the slot after cutting.
- A 1/2 thick piece of MDF to use as a spacing gauge. [Made from 2x pieces of 1/4 thick MDF CA'd together]
 |
| Depth stop swung into place on miter saw |
 |
| 1/8" MDF wedge keeps boards aligned and provides a reference for the next slot. These Slotted Insert boards are temporarily glued together. |
 |
| 1/2' spacing gauge up against the wedge to mark next line |
 |
| Aligning the slot and cutting it on miter saw |
Step 3: Follow this process for cutting the slots:
- Mark and cut the first slot 1/2" from one edge of the Slotted Insert glue-up then
- Insert the wedge in the last cut slot
- Hold the spacer gauge against the wedge and mark the next slot cut line
- With the wedge still installed in the last cut use the laser guide to set up and cut the next slot
- Go to sub-step 1 and repeat until all slots are cut. I cut 20 slots.
- Mark the same ends of the Slotted Insert sections so that when you part them you will know which end points the same direction
- Break the two Slotted Inserts apart. I just rapped the joint on the edge of the bench and the super glue gave way.
- Number the slots on the top edge, this aids in lining up either side of the blade when inserting into the crate.
 |
| Breaking the two Inserts apart |
Mounting the Slotted Inserts and Loading Blades
Screw the inserts 1/2 say down inside both sides. Drill pilot holes and screw from the outside.
Load in your blades. Some organization is useful. I loaded mine from the right to left. Highest # of teeth on the right moving to the lowest on the left. Hmm that feels backward!

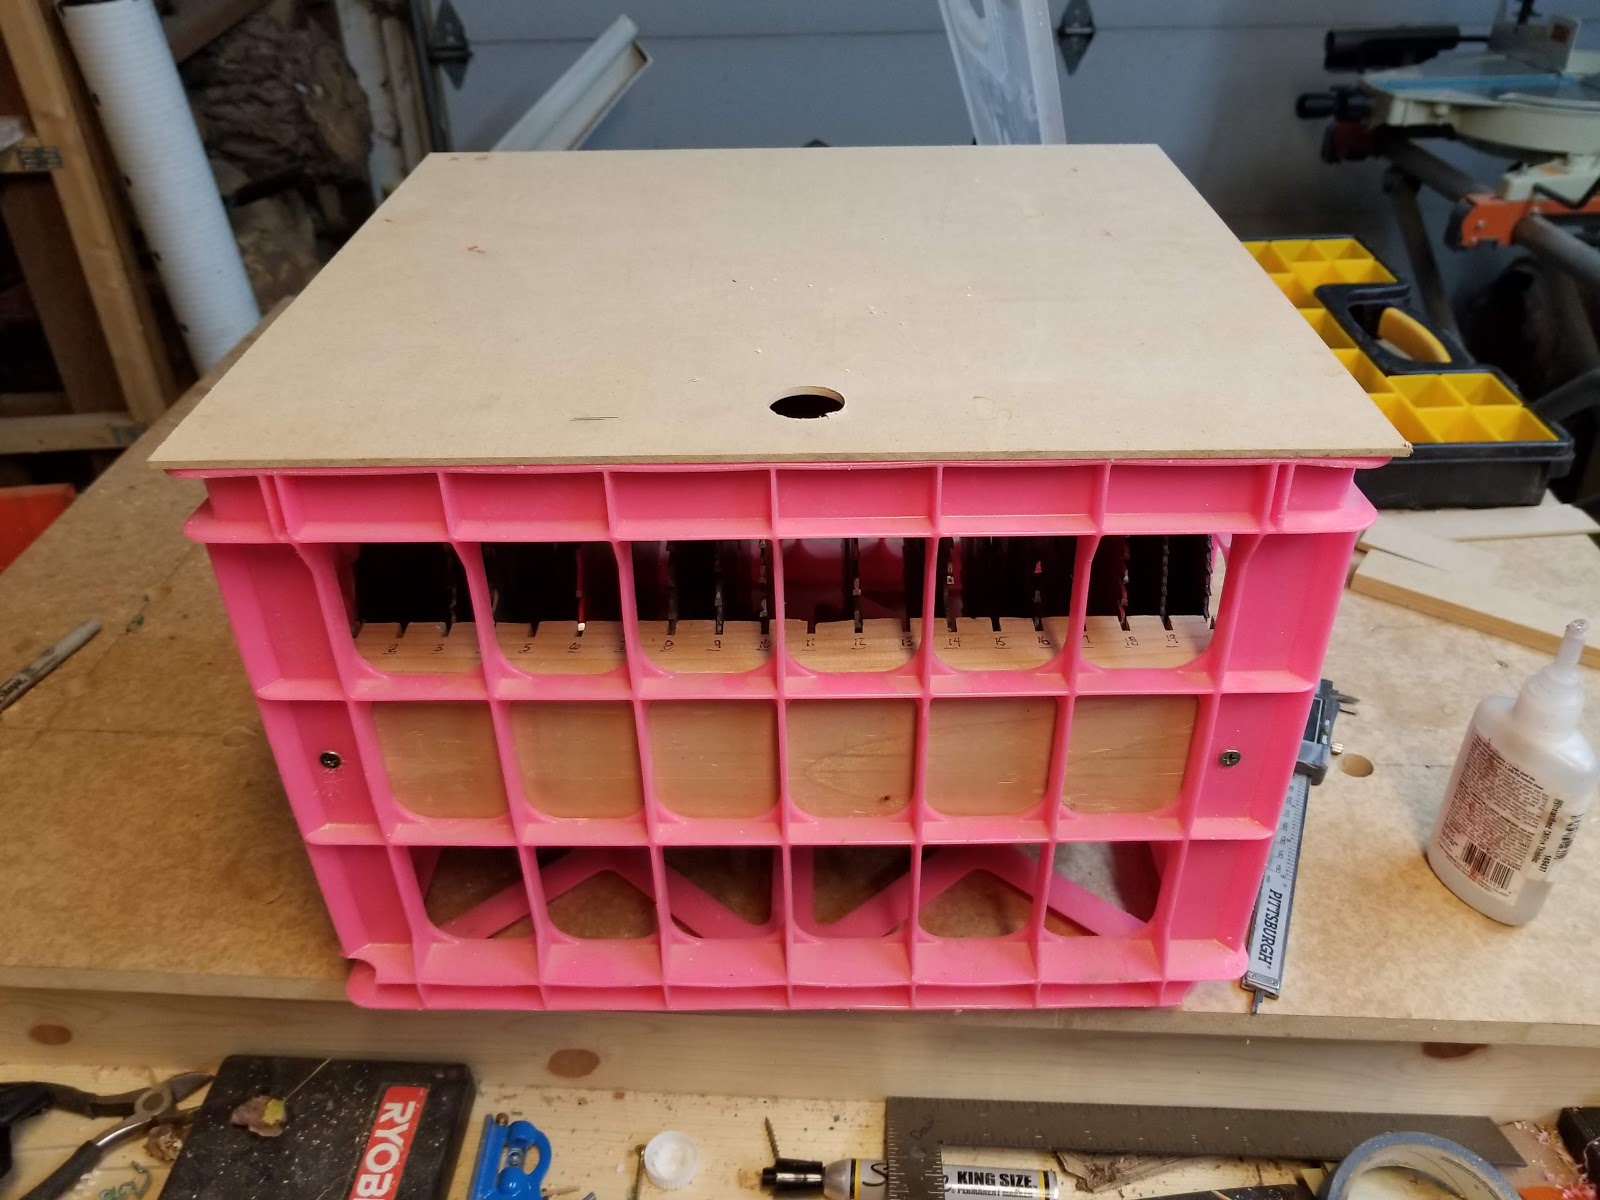
Add a Top for Safety
I advise making a top to protect the tops of the blades and any of your body parts that may come in contact with the sharp teeth.
 |
| Top shown upside down. Note the Slotted Inserts mounting screws 1/2 way down the face of the crate |
 |
| Completed Blade Storage Box |
Like any sharp tool in your shop the cutting edges can ..... well cut. You need to use care when handling saw blades and grab the blade from the crate with a pair of gloves. You will notice some bloody decorations on the top of my box. Yep cut myself!
 |
| Nicely tucked away in a corner |
Enjoy and comment;
Don
No comments:
Post a Comment