Sunday, April 7, 2019

Punky As It Was!

Punky As The Blank Was .....

..........I  managed to salvage it.

Spalted Maple Bowl

I have this shed full of wood that has been drying for +10 years, all harvested here in Utah.
Last week I visited the wood shed and found a piece of spalted maple that had stunning patterns.
That was the good news, the bad was that this wood was badly punked. It turned like powder. 

Determined to salvage this wood I decided to ignore the voids the powdered wood left while turning and just get it shaped and coated. 

The blank could not be mounted by its punky bottom (I tried) so I glued a hunk of plywood to the bottom and turned it. I later removed the plywood.

I brushed untold amounts of sanding sealer and finish on the rotating peice until I got the wood stabilized. 

Not the fine finish I am used to but I did manage to salvage a beautiful hunk of wood. As Greg, my wood-turning sensei used to say to me "let the wood speak to you" ...... it did!

I can always tell if I did good when my wife (who owns lots of round things) comes into the shop and says; "That bowl isn't going anywhere".

What I Learned About Turning Punky Wood

  • It likely that you will not be able to chuck the bowl with a turned foot. You can glue a block on the bottom to use as the foot and then turn it off later. This is the first time I tries this and it worked well.
  • You can brush on copious amounts of finish while rotating slowly on the lathe. This stabilizes the wood.
  • As always sharp tools help, turn at a fast speed
  • Wear a filter mask as there will be lots of dust

After it was clear that the foot would not hold
I glued on a plywood foot for turning.
Then it was turned off using the vacuum chuck.


Coating the surface with finish to stabilize the wood.


Pretty true spin after glue-ing on a block

 
Turning the bottom with a high angle grind on the tool.

Donate

If this post helped you solve a problem, saved you time or was otherwise useful consider donating. Use the link in the upper right of the site.
Donations fund some of the expense of tools and materials for my shop and lab so I can bring you more content like this.

Also let me know if there is other content you would like to see me explore!
Enjoy and Comment,
Don

Thread Cutting Tool


The Stubby Gets a Thread Cutting Jig

I have been working on and off building a thread cutting jig idea for my lathe to use to make boxes with threaded lids.
Recently I got back to it and solved a long standing problem I had with the chuck not turning concentric to its threading shaft.
The jig consists of a HF multi-axis vice, a few 3/4-16 nuts and a shaft all mounted on a removable platform on the lathe.
I use a 60 degree cutter mounted in the head-stock to cut the threads. The cutter is held in place with a collet and draw-bar.
The object to be threaded is mounted in a chuck which is then screwed to the threading shaft. A hand-wheel manually rotates the object as the cutter cuts the threads.
If you want to thread boxes you have three options:

  • Build your own, like this
  • Buy a professionally made jig
  • Learn to cut the threads by hand
Note: an advantage of a jig like this is that you can easily cut threads in common woods. Hand thread cutting is best done with woods that suited for that purpose.

Later I will post on operating this jig.

The Vice

The vice is a 5" milling vise that cost $70 at Harbor Freight. I took it all apart and cleaned and adjusted it. Its not the best cross-slide but if you insure that you lock the axis after each move, it works just fine. Your cross slide does not need as many axis as mine but I did not find the other options to be any cheaper, perhaps it is better quality? If I had to do it over I probably would have gotten the 6" vice with fewer axis.

The Threading Shaft

The main part of the jig is a shaft that has the same pitch as the threads you want to cut. This one is 3/4-16 but the bar can be replaced with whatever pitch you want. You have to get an adapter to screw the chuck on the threading shaft. I have only found adapters for 16 tpi and 10 tpi threads to fit 1-8 spindle threads.

Cutter & Collet

Any 60 degree double angle cutter should work. I do not know where I got mine, perhaps MSC.
I used a 3/8 collet and draw-bar to hold the cutter in the head-stock: 

Assembly

Once you have the parts the assembly is straightforward.
  • Make a base that can be clamped to the bed and holds the vice such that the threading shaft puts the chuck on center.
  • Clamp the shaft and three nuts into the cross vices upper jaws. The multiple nuts help reduce backlash.
  • Screw the adapter on the shaft with a backing nut. If your lucky the face of the backing nut will be share enough to get acceptable run-out of the chuck while threading. If not you will need to make your own nut from wood.

Wood Backing Nut

The problem that caused me to put the jig on the shelf is that the metal backing nut did not insure the chuck seated perpendicular to the threading shaft. So the chuck wobbled and that is not good for threads this fine.
I got a hint from a YouTube Mike Pierce posted and decided to try and make a wood backing nut so that I could get the face of the nut perpendicular with the shaft. Most nut faces are not that precise.
  • To make this nut I  drilled a 11/16 hole with a forsner bit in a peice of hardwood and threaded it with a 3/4-16 tap. I held the tap between centers to keep it straight. Use CA on the hole to help stabilize the thread cutting.
  • Then mount the tap into a collet and put it in the head-stock. Screw the wooden nut back onto the tap and with light cuts surface the face of the nut.
  • Now screw the wooden nut onto the threading shaft followed by the adapter.  

The Jig

Vice, shaft, nuts and adapter
Chuck attached, this backing nut created to much runnout.
Attached to bed with adjustable height bolts for legs

Tapping the wooden backing nut

Holding the wooden backing nut and facing it off.

The jig with the wooden backing nut installed

The First Successful Threads Cut


The threads in this box were a bit tight. I put the entire jig and assy back on the lathe wondering if it was repeatable and cut the base's threads deeper. That loosened up the threads, apparently the jig is repeatable :)!

Parts for the Jig


Some other threading builds


Donate

If this post helped you solve a problem, saved you time or was otherwise useful consider donating. Use the link in the upper right of the site.
Donations fund some of the expense of tools and materials for my shop and lab so I can bring you more content like this.
Also let me know if there is other content you would like to see me explore!

Enjoy and Comment,
Don

Saturday, March 23, 2019

Milk Carton Storage Bins

Inexpensive Storage Bins


Way back when I was a boy in my dad's shop I learned how to cutout milk cartons to use as storage bins. To this day I use these bins throughout my shop.
They are inexpensive, waterproof and the ideal size for storing stuff.
Now days milk mostly comes in plastic but I drink orange juice and almond milk which still come in cartons.
Get a carton, wash and dry is out and then cut out only the top. This leaves a nice storage bin that even has a handle. I also use them to keep all the parts of projects I have in process all in one place. Believe me I have way to many projects in process.

Storage Carton Bins in my work spaces


This is a multi-tier milk carton bin shelf storing a whopping 60 cartons. See video!

An Inexpensive Sorted Storage Bin

I was keeping small parts like resistors and LED's in these cartons but further sorted into pill bottles which were then kept in the carton. That turned out to be a little less organized than I wanted. 
I dawned on me that I could make a pill bottle holder the same size as the cartons, making it easier to see the labels on the pill bottles and retrieve the parts.
The top is 1/8" and the sides are 1/4 both are fiberboard I got at HD.
The sides are glued and clamped to the top after cutting the holes with a Forsner bit.
You can lay out whatever pattern suites the type of parts you are storing. In this case they are resistors sorted by the multiplier band. 
It fits on the shelf next to and in the same space as the other bins.

This method would probably work well for surface mount parts also.


Donate

If this post helped you solve a problem, saved you time or was otherwise useful consider donating. Use the link in the upper right of the site.
Donations fund some of the expense of tools and materials for my shop and lab so I can bring you more content like this.
Also let me know if there is other content you would like to see me explore!


Enjoy and please comment.
Don


Tuesday, March 5, 2019

Penguin

Every once in a while you need to do something fun and so simple you can't mess it up!

My wife likes Penguins so I figured that a fun Sunday project would be to turn one. This one is made of rosewood and figured maple.

The maple was sliced off a slab, sanded on the drum sander and laminated to one surface of a block of rosewood.

Very simple to turn and finished with teak oil.


Enjoy and comment,
Don

Wednesday, February 20, 2019

A Quick Valentines Day Project


I had a hunk of Apricot that I got from a downed tree. Its been drying for quite a while and I decided it needed a home.

This potpourri vessel was made for my wife on Valentines day. The insert came from Woodcraft.


This blank had nice figure and a small crack that I stabilized with super glue and some wood dust.
The lip was turned to accept the insert keeping it slightly above the surface.
The bottom was turned flat.
Apricot is an extremely hard wood but finished nicely
I held the blank from the bottom with a dovetail recess.
 I later removed the recess and added my traditional ring and signature


I wanted to try out my new carbide tools on hardwood. I wasn't that impressed with how they cut on a previous project but in this application they worked well. On the inside I got to a nice finish that only needed some touch-up sanding.


On the outside I still needed a better finish after using the carbide tools. Brought in the scraper for the final surface. Very little sanding need on this project.

I also tried out a new POV using my new overhead camera setup.

I used an oil finish to preserve the satin look of real wood.

Donate

If you enjoyed this project/post or my blog consider donating which funds more tool and materials.
You can donate by clicking the "DONATE" button in the upper right of this site.


Enjoy and comment,
Don

Tuesday, February 19, 2019

Shop Vac + Cyclone Station

I do a lot of wood turning and typically sweep up the BIG stuff followed by vacuuming. This keeps me from overloading the filter in the shop vac with large chips.

Woodstock W2049

The key ingredient of this build is a simple plastic cover that goes on a 5 gallon bucket.
You can help me out by using my affiliate link to purchase, it costs you nothing ;)

Woodstock W2049 Kit

Fabrication

The station is made using 4x 2" pvc fittings and pipe acting as the stanchions with a plywood platform for the bucket:
  • 4x - 2" coupling inserted into the accessories slots in the vacuums feet. They fit perfectly.
  • 4 Pieces of 2" pipe are cut such that when inserted into the coupling their tops are 4" above the vacuum.
  • 2" caps are pushed onto the top of each pipe and used to affix a 3/4" plywood platform to the pipe. 
  • My platform was 18" x 18", your needs may vary with the size vacuum you are using.
  • I flattened the tops of the caps and tapped 14-20 threads in them used to fasten the plywood platform.
  • Cut the plywood and take the time to mark and drill 4x 1/4" holes so the pipes are straight after assembly. 
The completed unit

I added a base for the bucket to sit in to keep it from sliding. Notice that I did not have enough white pipe so I used some black sewer pipe I had laying around.

I bent the handle to use as a retainer for the lid. The lid will pull down tight when the suction starts.

Empty the containers

  • To empty the shavings I simply pop the handle down, pull off the cyclone and empty the bucket.
  • To empty the vacuum there are 4 1/4-20 bolts to remove [I will replace with wing bolts] and then remove the top of the vacuum and empty it.
  • The vacuum is harder to empty than before but the shaving bucket it easier.  

Performance

After sweeping up around my lathe. I was hollowing so it was mostly fine dust. Looks like its working well

Donate

If this post saved you any time, consider donating in the upper right corner of the blog. Donations are used to buy more tools and materials.


Thanks and please comment;
Don

Saturday, February 16, 2019

Shop-made Disks for WS300

Making Additional Disks for WS3000

I figured that since MDF was a pretty flat material I could make replacement disks for my WS3000 and not have to buy additional glass plates in order to have a selection of grits.

MDF Disk Fabrication 

The following sequence shows the approach I took to fabricating my disks. I used 1/2 MDF from Home Depot as the material.

6" squares were cut , the centers marked and then a 1/2 hole was drilled.
Final measurements written on the disk. Do this step as accurately as possible.

Removed excess material on the band-saw. Final measurements are written on the disk.

cut the head off  a 1/2 bolt  and inserted into my collet on lathe

Mounted and turned the disk round on the lathe

Flattening and sanding to thickness.

Disks were surface sanded to match the glass disk's thickness
Pretty decent results! 

Stropping Disk

Using one of these shop made disks I also made a stropping disk.
The leather for this disk is in the worksharp-3000-lapping-upgrade kit.

Stropping Disk Fabrication:

  • Make one of the disks shown above
  • Spray adhesive on both sides; the leather and the MDF. Make sure that both have plenty of glue as the disk and leather are porous.
  • Mark the leather using the MDF disk as a template. 
  • Cut the leather in a circle to fit the disk, I used tin sheers to get a good edge
  • Cut a 1" diameter in the center of the leather. This allows the fastening knob to seat on the disk not the leather. I used a sharp Xacto knife after drawing the center circle on the leather.
  • Charge the leather with polishing compound.
  • I made two of these stropping disks one each with the leather rough side up and down.

Cost Comparison

Cost of WS leather hone: $29
Cost of shop made hone: $2.44
  • 1/6 of MDF sheet  $8/6 = $1.33
  • 1/4 of leather sheet $12.99/4 = $3.25
  • Total = $2.44

Assessment

This was an easy accessory to make. I was pleased with the minimal run-out I achieved. Your mileage may vary if you do not have a lathe but employing a circle cutter jig may work just as well.

Upside: very cheap and available
Downside: not as easy to remove an abrasive from the MDF as the glass ..... make extra MDF disks!

Run-out: a 1/2" bit is slightly larger than the actual WS3000 spindle. As a result the disk runs a bit out of round if you just throw it on the spindle. I found that you can set the MDF disk over the spindle and get it on center by eye if you are careful. Not sure this amount of run-out is a problem. BTW the glass disk also has a bit of run-out.

Donate

If you enjoyed this project/post or my blog consider donating which funds more tool and materials.
You can donate by clicking the "DONATE" button in the upper right of this site.


Enjoy and please comment
Don

Monday, January 28, 2019

DIY Worksharp Accessories

Accessorizing the WS 3000

I recently bought a Worksharp WS3000. I was thinking about how to build one but the price on Amazon suggested it probably wasn't worth the hassle and my time away from my other projects.

That said, I found the accessories to be pretty expensive and the tool bar attachment is no longer available.

Diamond Lapping Plates

DMT sells a sharpening and honing kit for the WS3000. The kits use a 6" diameter lapping plate. The lapping plate is held onto the glass disk with a sticky back magnetic sheet (like a refrigerator magnet. These are pricey, on amazon for $65 + shipping.

I started to covet this accessory but then found that McCauley had already figured out a replacement using stock Amazon parts.

These parts are on order to try this system out...
3000 grit Diamond coated sheets  (don't waste your money on this)
About $40 total. I will report back after testing this system

I used the above setup to sharpen a plane's blade. All of the disks worked perfectly except the 3000 grit.  It immediately scored the disk and the planes cutting edge.


I have found an alternative 3000 grit lapping plate that albeit more expensive it got better reviews. It is included in the parts kit I created.

I also found that the magnet sheet is not really necessary. Putting the lapping plate on the spindle first and then the glass plate on top works fine.

I ended up using the magnet sheet to hold the lapping plates on the wall near my sharpening station :)!

Lapping Disk Kit

I built this kit of parts for this build. If you use this kit to buy your parts I make some affiliate $ and it costs you nothing.

Worksharp-3000-lapping-upgrade Kit

Other WS3000 Accessories

I also made these accessories:


Additional Disks

Tool Bar Attachment [I will make this if I have trouble sharpening my carving gauges]

If you enjoyed this project/post or my blog consider donating which funds more tool and materials.
You can donate by clicking the "DONATE" button in the upper right of this site.

Enjoy and please comment,
Don

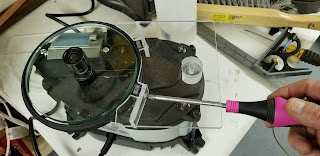
WS3000 Wide Tool Rest


The wide tool rest is $70 and was out of stock in most places I looked. I wondered how hard it would be to fabricate a shop made equivalent.
Since I also need to make a Tool Bar Attachment I figured that is would be worth the time to see if I could interface to the mounting slots on the side of the WS3000. I believe these are the slots used to mount the factory version.

Design

I decided to make a platform that connected to the mounting slots on the perimeter of the WS3000 circumference. I decided that 1/4" acrylic would be a strong and easy to work with material. Its transparency would help me locate WS features under the table.
I think that acrylic will wear OK since the tool will normally sit static in its holder on the plate and not really move much while sharpening. We will see?

The completed assembly shown upside down
The design ended up being 9 parts. 
  • 1x Base plate: all other parts are mounted to the plate. Its surface is aligned to the sharpening disks surface. (see attached outline below)
  • 1x Rear adjuster: functions as a stabilizer and adjuster. Turned from a scrap block of acrylic. A 1/4-20 hole is tapped in its center and a set screw installed. A flat was ground on one side to account for an interference with a feature at the rear of the WS3000
    • Height = .9"
    • Diameter = 1.14"
  • 1x 1/4-20 set screw: adjusts the rear of the plate up-down.
  • 2x mounting flanges: these 1/4" acrylic flanges are glued perpendicular to the plate. These flanges secure the entire assy. against the surface of the mounting guides
    • L= 2"
    • H= .93"
  • 2x Nut Plates: these 1/4" acrylic nuts with 8-32 threads are inserted into the mounting guides
    • W = .43"
    • L= .9"
  • 2x 8-32 mounting screws: these screws fasten the entire assy. against the mounting guides using the nut plates.
Notes:
The dimensions above are taken off my final unit most dimensions are not critical
The location of the mounting screws vs the mounting slots IS important 

Outline Pattern

This turns out to be a pretty simple design and could be easily CNC or laser cut. Since I am only doing one I did not put this design into CAD form. The tough part is getting the slots located and spaced on the circumference of the WS3000.  I traced the outline of the base plate to get you started. I think if you download and print 1-1 this should print actual size.

Adjustments

Use a square laid across the disk to set the height of the plate. The plates front is adjusted by loosening the front mounting screws moving the plate to position an then re-tightening them.
The rear is adjusted be inserting an hex wrench into the adjuster hole and adjusting the rear of the plate.

Advantages


  • Cost and availability

Disadvantages

  • The need to re-adjust each time the assembly is removed. [I plan to make a precision spacer that helps set the height of the plate]
  • Potential wear of the plates surface?

Fabrication Details

Initial layout glued to acrylic
After cutting at the band-saw

Lining up the mounting flange with nut plates
Gluing the plate on the top of the mounting flanges

Weight provides stability while the glue sets up. Note the glue.
Glue dry!


Turning the adjuster. Doesn't need to be this pretty, any block would work

Adjuster glued and held in place with a 1/4-20 nut


If you enjoyed this project/post consider donating which funds more tool and materials.
You can donate by clicking the "DONATE" button in the upper right of this site.

Enjoy and Comment, 
Don

Saturday, January 26, 2019

New Years Resolution Phase 1: Two bee or not two bees

Phase 1: Practice Carving the Bees

New years resolution! 

Get back to a long imagined plan to advance my woodworking skills and combine them into unique pieces.

Goal: 
By the end of the year show a combination piece consisting of:
Woodturning + woodcarving+ pyrography + CNC + flatwork.

Setting up the shop for carving

Of course this is and excuse to buy some tools and ways to properly store them.
I already have a turbo carver and a set of palm chisels but lacked a set of decent full size chisels.
I found Mary May's Woodcarving and this was a great refresher. I will be back to this resource to get advanced instructions. The basics were free and the videos were very well presented.
That site directed me to Chippingaway where I bought the beginner set of chisels. This was the best price I could find for Pheil tools and Mary May had pre-selected a starter set.

I then built a case for the chisels that allowed me to hold the chisels while carving as well as store them. These tools are a dream to use. Now I have to hone my sharpening skills on a new set of tools. Uggh I hate it when that happens!
I used my bench bull laid flat on the bench to increase the height of the bench (aching back) and that helped make the hand carving more enjoyable.


This project combines flatwork+woodcarving+pyrography

I carved this Bee scene into basswood as practice since I have been way from carving for N years. The bee image came from the web. To make a flexible template I attached a paper copy of the bee to the sticky side of a piece of sticky back foam, the kind you get at Micheal's. Then I cutout the bee from the substrate with an xacto knife. This provides a robust pattern that can be formed around curved surfaces and traced.
The B was copied on my printer...

The copy was pressed onto the back of this foam material
Add caption
Roughed out
After finish and sanding
A hexagon was cut from thick Vellum and glued to the end of a stick.
The stick holds the hexagon on the surface while a pencil is used to outline it.

Waiting to burn the hive in the background

The Final Countdown

Hive burned into the background

Color added with colored pencils that are dipped in turpentine

Next steps

My plan is to carve this same scene, up around the mouth, on an aspen vessel .

If you enjoyed this project/post consider donating which funds more tool and materials.
You can donate by clicking the "DONATE" button in the upper right of this site.

Enjoy and please comment,
Don